Home improvement projects can be immensely satisfying, and plumbing is no exception. However, it’s crucial to understand your limits. Tackling certain plumbing projects on your own can save money and provide a sense of accomplishment. Yet, other tasks require the expertise of a professional to prevent costly mistakes and potential damage. Here’s a guide to help you navigate DIY plumbing projects.
Projects You May Be Able To Do Yourself
Fixing Leaky Faucets
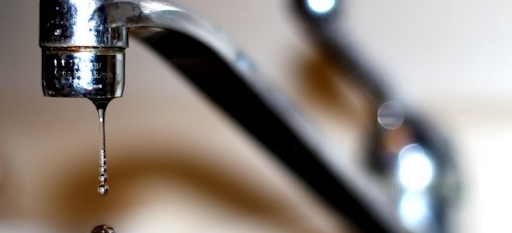
A dripping faucet is not only annoying but can also waste a significant amount of water over time. Most leaky faucets are caused by worn-out washers or seals, which are relatively easy to replace. With basic tools and a little patience, you can stop that drip and save on your water bill. Follow these steps to fix it:
- Identify the Type of Faucet: Know whether you have a compression, ball, cartridge, or ceramic disk faucet.
- Turn Off the Water Supply: Shut off the valves under the sink and open the faucet to release any remaining water.
- Plug the Sink Drain: Use a sink plug or rag to prevent losing small parts.
- Remove the Faucet Handle: Remove the handle using a screwdriver. Pry off any decorative caps first.
- Disassemble the Faucet: Use a wrench or pliers to remove additional parts and inspect the washers, O-rings, and seals for wear.
- Replace Worn Parts: Get exact replacements for the damaged parts from a hardware store.
- Reassemble the Faucet: Put the faucet back together in reverse order of disassembly.
- Turn the Water Supply Back On: Slowly turn the water back on and check for leaks.
- Test the Faucet: Turn the faucet on and off several times to ensure smooth operation.
Unclogging Drains

Clogged drains are a common household problem that you can often handle yourself. Follow these steps:
- Gather Tools: Plunger, plumbing snake, baking soda, vinegar, hot water, gloves, and a bucket.
- Use a Plunger: Cover the drain, create a seal, plunge for about 20 seconds, and check if the clog is cleared.
- Use a Plumbing Snake: Insert the snake, push and rotate to break up the clog, then pull it out and test the drain.
- Baking Soda & Vinegar: Pour 1/2 cup of baking soda down the drain, add 1 cup of vinegar, let it sit for 15 minutes, then flush with hot water.
- Repeat if Needed: For stubborn clogs, repeat the baking soda and vinegar treatment.
Chemical drain cleaners should be used sparingly as they can damage pipes over time. If you can’t clear the clog, it’s best to seek professional help.
Replacing Showerheads
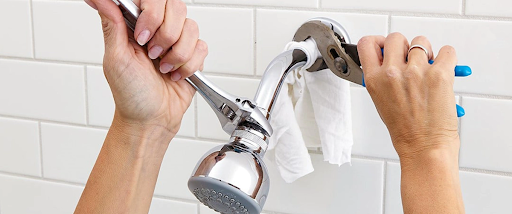
Swapping out an old showerhead for a new one is a straightforward DIY task. Follow these steps:
- Gather Tools: Adjustable wrench, plumber’s tape, new showerhead, cloth.
- Remove Old Showerhead: Turn off the water, wrap a cloth around the old showerhead and pipe, and use a wrench to loosen and remove it.
- Clean Threads: Remove any old plumber’s tape or debris from the shower arm.
- Apply Plumber’s Tape: Wrap plumber’s tape around the threads of the shower arm.
- Install New Showerhead: Screw the new showerhead onto the shower arm by hand, then gently tighten with the wrench.
- Test for Leaks: Turn the water back on and check for leaks. Tighten if necessary.
- Adjust Settings: If your new showerhead has adjustable spray settings, test and adjust them to your preference.
Replacing a showerhead is a simple and quick way to upgrade your shower experience.
Installing a New Toilet Seat
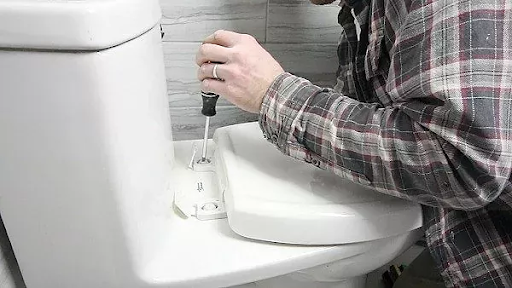
Replacing a toilet seat is a quick and easy project. Follow these steps:
- Gather Tools: New toilet seat, adjustable wrench or pliers, screwdriver (if needed), cleaning supplies.
- Remove Old Seat: Locate and unscrew the bolts at the back of the seat. Lift off the old seat.
- Clean Area: Clean around the bolt holes if needed.
- Position New Seat: Place the new seat on the toilet, aligning the bolt holes.
- Secure New Seat: Insert bolts through the holes and hand-tighten the nuts underneath. Use a wrench to tighten further, but don’t overtighten.
- Check Fit: Ensure the new seat is secure and aligned. Open and close the seat to check for stability.
With minimal tools and a few minutes, you can easily replace your toilet seat and freshen up your bathroom.
Installing a Kitchen or Bathroom Faucet
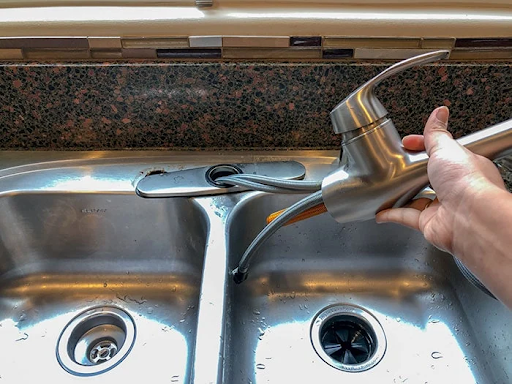
Enhance your kitchen or bathroom with a new faucet. Follow these steps:
- Gather Tools: New faucet, adjustable wrench, basin wrench, plumber’s tape, bucket, cleaning supplies.
- Turn Off Water Supply: Shut off valves under the sink and open the faucet to release pressure.
- Disconnect Old Faucet: Place a bucket under the sink, disconnect supply lines, unscrew mounting nuts, and remove the old faucet.
- Prepare New Faucet: Assemble components and apply plumber’s tape to threaded ends.
- Install New Faucet: Insert the faucet through the holes, secure with mounting hardware, and reconnect supply lines.
- Test for Leaks: Turn on the water supply, check for leaks, and test functionality.
Installing a new faucet is a manageable DIY project with the right tools and patience.
Projects Best Left to Professionals

Major Pipe Repairs
Repairing or replacing large sections of pipe, such as main water lines, sewer lines, or large-diameter pipes, requires specialized knowledge and equipment. Mistakes can lead to significant water damage and expensive repairs. If you have a major pipe leak or need to replace old pipes, it’s best to call a licensed plumber.
Water Heater Installation or Repair
Water heaters are complex appliances that can be dangerous if not handled correctly. Whether you’re dealing with a gas or electric water heater, improper installation or repair can lead to serious hazards such as gas leaks, explosions, or electrical fires.
Sewer Line Issues
Problems with your sewer line can be particularly unpleasant and challenging to fix. Sewer line repairs often require specialized tools and expertise to locate and fix the issue without causing further damage.
Bathroom Remodels
While you might be tempted to handle a bathroom remodel yourself, it typically involves a lot of plumbing work, including rerouting pipes and ensuring proper drainage. Mistakes can lead to leaks, mold, and other issues that can be costly to repair.
Gas Line Repairs
Anything involving gas lines should be handled by a professional. Gas leaks can be extremely dangerous, leading to fires, explosions, or carbon monoxide poisoning. If you suspect a gas leak or need work done on your gas lines, contact a licensed plumber immediately.
Disclaimer
DIY plumbing projects can be a rewarding way to save money and learn new skills, but it’s crucial to know your limitations. Simple plumbing tasks are within the reach of most homeowners. However, for more complex and potentially dangerous projects like major pipe repairs, water heater installation, sewer line issues, bathroom remodels, and gas line repairs, it’s best to call in the professionals. Understanding what you can and can’t do yourself will not only keep your home in top shape but also ensure your safety and peace of mind. When in doubt, reach out to the experts at Colony Heating and Cooling. Our licensed professionals are ready to assess your situation and provide the expert advice you need to keep your home running smoothly. Call the guys you can trust at Colony.